Hello fellow creative souls,
I am so excited that you are here with us today as it's my turn to bring you some inspiration. For this occasion I created a layout with a bunch of beautiful 2Crafty Chipboard pieces. All the chipboard pieces are treated in different ways like embossing, spraying and waxing. The flowers are handmade with some awesome dies and the picture I used is of our pretty little girl.
2Crafty Chipboard used:
9" Steampunk Border
Our Sweet Girl Title
Hinges Pack
Fern Leaf Set
Mini Title Stick Set 1
Freda's Butterflies
Mini Word Set 2
Mini Title Stick Set 3
Firstly I coated the chipboard pieces with a layer of white gesso, then I took the 9" Steampunk Border, the hinges and the word adore and layered them with a coat of black gesso. Then I treated those same pieces with two different waxes and then I ramdomly added some acrylic paint with a tiny brush on them.
The ferns I sprayed three time to cover them nicely then I used my heat gun to let it dry a little faster. Then I randomly added some green acrylic paint with a paper towel so you get it a little on even as I like.
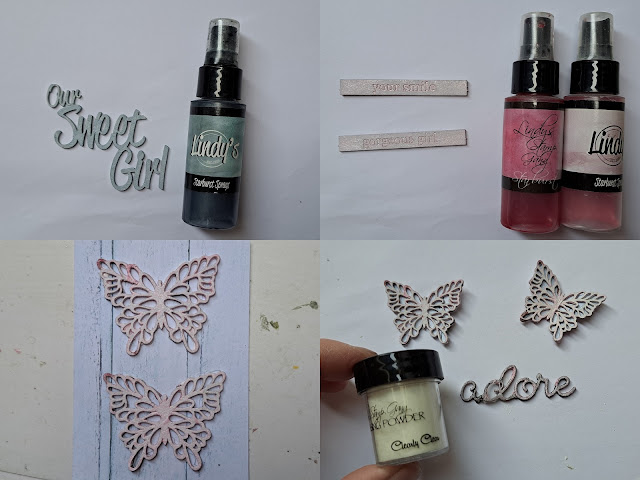
Behind the butterflies I added some paper from the collection I used but before I did that I coloured them with both of the pink sprays you see in picture two. Then I used some clear embossing powder since I wanted them in the pink color. The phrase I used is only treated with some blue spray as you see on picture one.
Thank you so much for your visit today. And I sure hope that I have inspired you to take out your lovely 2Crafty Chippies and create and have fun while doing so. Have a blessed & sunny upcoming week!


Geen opmerkingen:
Een reactie posten